
In case you’re new to retro reflective photo eyes:
A retroreflective photoeye is a type of photoelectric sensor that uses a reflective surface to detect objects. These are often used in overhead doors, automatic gates, and parking barriers. They are typically used to detect when an object is in the path of the door or gate, and to trigger the opening or closing.
To achieve the best alignment, we developed a method named the Haush method. Take a look below to see how to do it!
What is the Haush Method?
The Haush method was developed as a natural process for obtaining proper placement and alignment of the reflector for a retro reflective photoeye installation.
Using this method not only assures proper installation, but can also enhance the range and performance. Additionally, it is a more efficient and accurate method when compared to the “hand-held” technique.
The method is simple. It does not require special skills or equipment to learn or implement and can be used for any type of photoeye, regardless of the manufacturer.
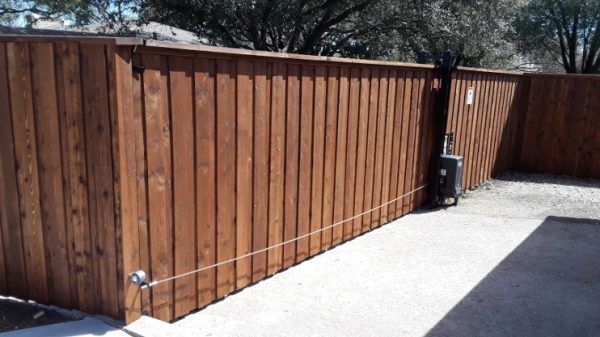
In overhead doors, automatic gates, and even parking barrier applications, it is absolutely critical that your photoeyes work reliably for the safety of the install and its users in both residential and commercial settings
5 steps for success
We will use the EMX IRB RET as an example here but the process should be universal for any retro reflective photoeye.
Step 1:
Install the retroreflective photoeye near your gate or door accordingly using your mounting hardware (included in our IRB-RET KIT) and set the gain or sensitivity adjustment to 1/3 of the maximum.
Step 2:
Hold the reflector and stand 4-6 feet away from the installed photoeye. Position the reflector to intercept and reflect the beam until the Green LED and Red LED on the photoeye are on and steady.
This step is critical. If the reflector is not in the proper position, the photoeye will not function correctly and at best it will have poor range.
Consult your specific photoeye manual for status identifiers.
Step 3:
Slowly back up to the desired mounting location for the reflector, while maintaining the active status indicator on the photoeye.
For the IRB-RET, solid green and solid red LEDs.
Once at the desired location, move the reflector up, down, left, and right to identify the active target area (usually about a 2-foot circle).
If the photo eye loses signal before you arrive at the desired distance, start step two again with the sensitivity/gain set to 1/2 of its maximum and repeat step 3.
Step 4:
Once the target area has been identified, mount the reflector as close to the center of the target area as possible.
Following this step will reduced signal related call backs significantly.
Step 5:
Once the reflector is aligned and securely mounted, increase the gain or sensitivity to the maximum setting.
JOB WELL DONE!
We have found that this process gives our installers the best and most reliable Photoeye operation no matter the situation and results in far fewer callbacks. We always recommend using hoods as well, particularly if a wide variety of weather is expected.
We hope you find this helpful and always appreciate feedback so we want to hear from you if this worked, needed a bit of tweaking or you have an entirely different method that works better.
Looking for a one-and-done solution for your next retro reflective photoeye installation? Check out our EMX IRB-RET!
This complete kit includes everything you need for a clean and efficient installation.
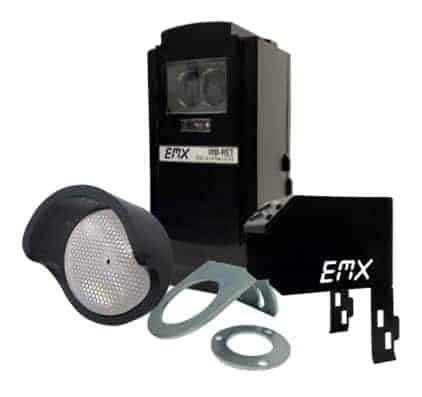
The IRB-RET is a durable, long-range, reliable retroreflective photoeye that is perfect for any residential or commercial application.
Seriously, our one single package features all of the hardware (think mounting bracket), reflector, and photoeye- everything you need for a successful installation.
It really doesn’t get any easier than that!
The IRB-RET features…
- Kit includes photoeye with hood, reflector with hood, and mounting bracket
- Retroreflective configuration
- UL325-2018 compliant
- Six (6) monitoring interfaces
- 60 ft. operating range
- Easy installation and set-up
- Compatible with many operators